
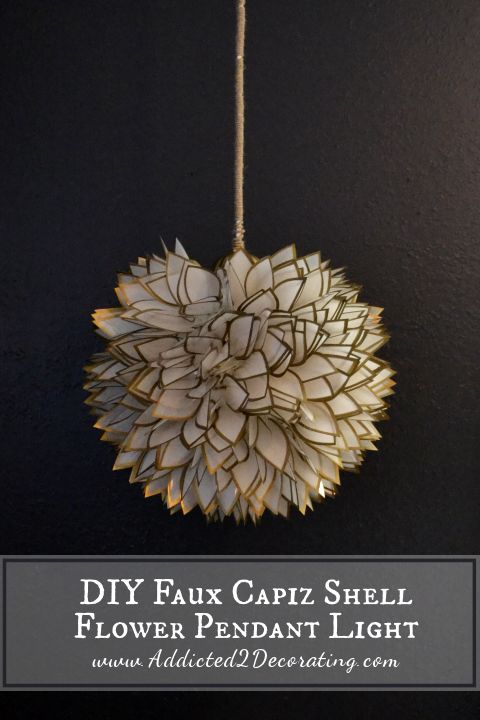
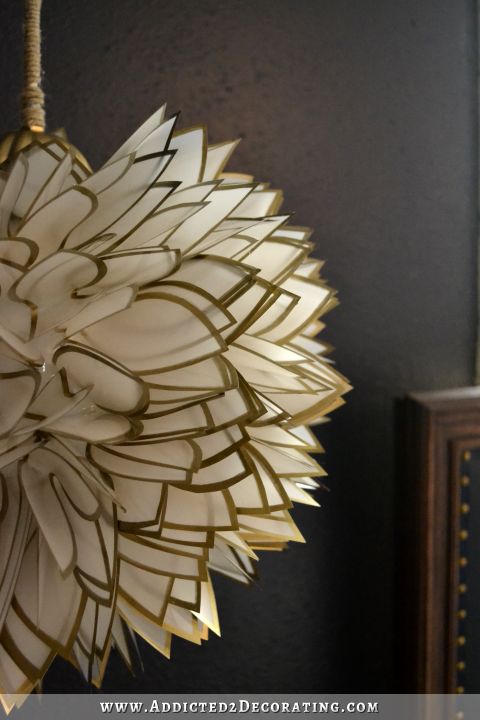
I’m halfway through with Master To-Do List Item #89 — find or make bedside lighting for our bedroom. I made a faux capiz shell flower pendant light.
This was one of the most time-consuming projects I’ve done, but I just worked on it a little bit each day. Some people read or crochet in the evenings to unwind and relax. I cut out petals for my pendant light.
I still need to make one more, so it’s a good thing I find the process relaxing and enjoyable!
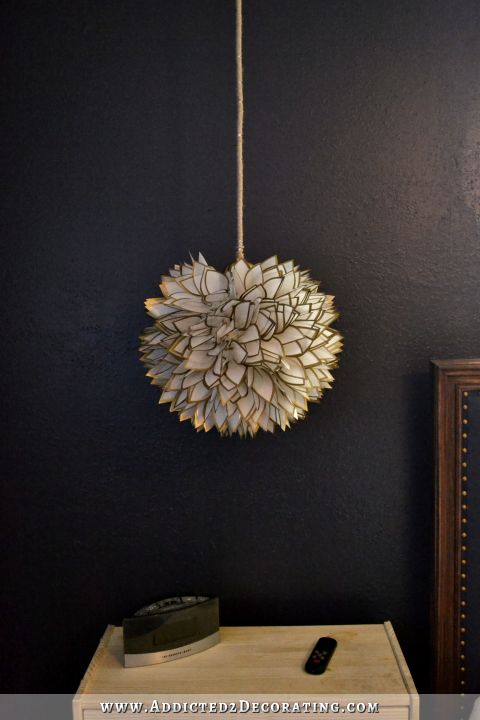
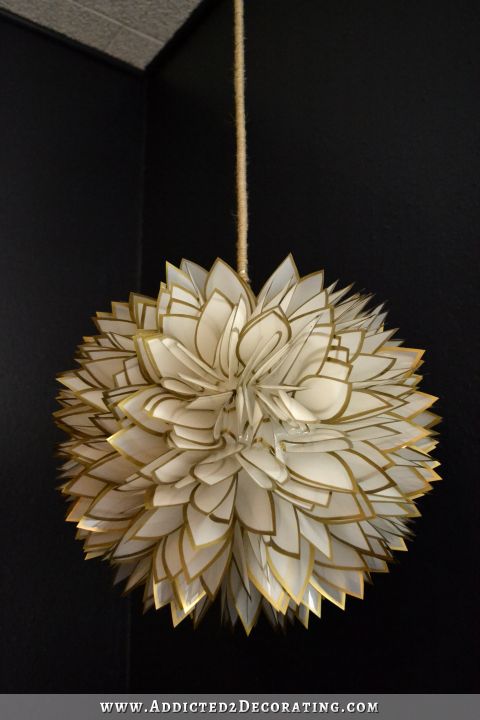
I love how it turned out! It’s the perfect size for a bedside pendant light (about 16 inches diameter), and it puts out a beautiful amount of light for evening use.
Here’s how I made it…
My mom used to have two of these faux capiz shell lights in her living room…

When we redecorated her house a few years back, she took them down and put them in storage. I found them about a year ago, and asked if I could have them. I couldn’t really decide if they were vintage enough to be really awesome, or if they were just outdated, so I held onto them to see if inspiration would strike. It was the scalloped edge and the fact that the faux capiz shell shade didn’t completely hide the glass globe inside that finally pushed me into the “outdated” camp.
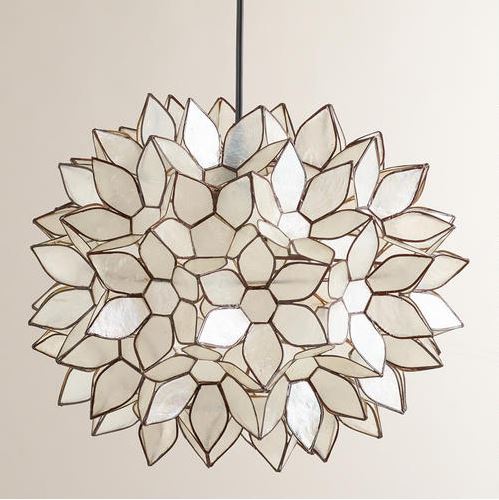
While I love just about any type of chandelier or pendant light made with capiz shells, my favorite ones are the round flower lights. I had hoped to find something in my price range that I could just buy, but everything in my price range seemed a little lacking to me. This one from World Market was one of the cheapest ones, but it seemed really skimpy on petals, and I didn’t like that you can see the metal cage through the petals. Plus, you have to purchase a light kit separately, which seems strange to me. For two lights, I’d still be paying at least $330.
So I decided to use the glass globe and the shade holder from my mom’s old lights and create my own. (If you don’t have lighting parts you can recycle, I found shade holders here, and I always see these glass globe shades at ReStore. Just be sure you’re getting the right size holder for your shade since the openings come in different sizes.)

It took me a while to find the perfect material to make my petals. At first I thought of wax paper. Remember a while back when faux capiz shell chandeliers made out of wax paper were all the rage? Well, I tried it. And I can almost assure you that all of those wax paper chandeliers made a few years ago have since been thrown in the garbage. Even with four sheets of wax paper ironed together, those petals were still way too flimsy and delicate. I can’t imagine how a chandelier made from wax paper could be cleaned.
So then I thought vellum might work. I did lots of scrapbooking back in the day, and I remember that vellum came in different thicknesses. Unfortunately I could only find the super thin vellum, which wouldn’t have been any more durable than wax paper.
I was about to give up, and then I realized that I actually had something that would work — Gila frosted privacy window film! It’s thick, durable, and made from plastic.
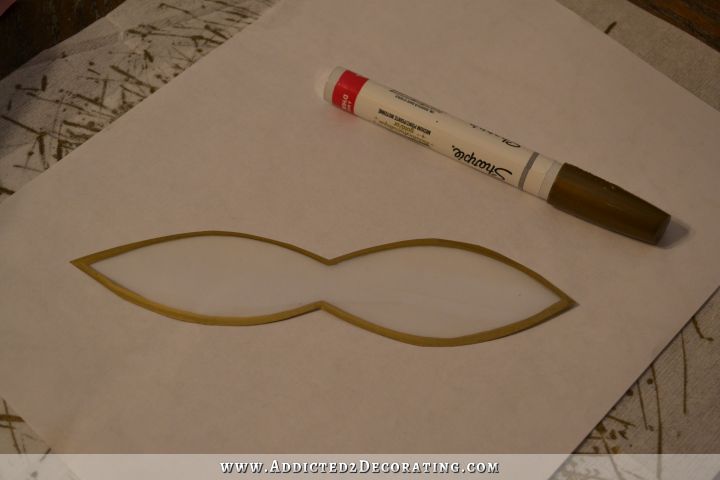
So I created my petal pattern and got busy tracing and cutting out petals. I tried several different patterns — whole flowers, single petals — and finally decided that the double petal pattern worked the best. I just traced them onto the dull side of the film with a pencil. (The other side is shiny plastic.)
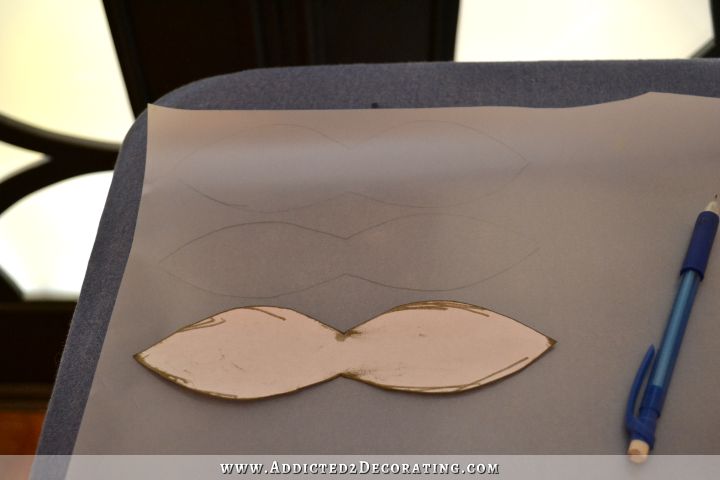
Then I cut them out and outlined the edges on both sides with a gold Sharpie paint pen. I used the oil-based paint pen, not the water-based paint pen. I did try the regular felt-tip Sharpie in gold, but the color wasn’t as vibrant and metallic, and the ink ran out way too fast. The oil-based paint pen lasted way longer, and the color was perfect. I ended up using two paint pens for the entire light.
I propped the glass globe upside down on a plastic container, and started gluing on the petals. I just folded the pieces in half, put a bead of high temp hot glue on the crease, and stuck them to the glass globe as randomly as possible I didn’t want any noticeable patterns in the way I attached them. It took way more window film than I anticipated to cover the entire globe. For this light, I used about one-and-a-half packages of window film.

I didn’t want this light hanging by a chain with the wire exposed like the original light had, so I rummaged through my lighting supplies and found two IKEA Hemma cords that I had purchased several years ago on Ebay.
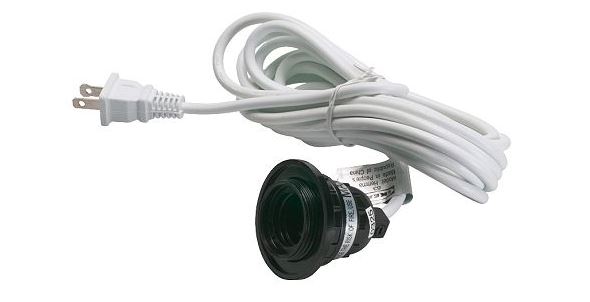
I love those round cords, but the light socket wouldn’t fit my light. So I cut the light socket off, and rewired it to a regular socket that would fit my shade holder. I finished the light by giving the shade holder a coat of antique gold paint, and then wrapping the white cord in jute.

I was a bit nervous that all of the gold edges on the petals might create some really crazy shadows, but this light casts no shadows at all. It creates such a beautiful light for evening and late night use when I don’t want super bright lights.

I used high temp hot glue to attach the petals, so I was fairly certain that this light would be fine with a regular incandescent bulb (although I probably wouldn’t use anything more than 60 watts). However, I didn’t want to take the chance after all of that work, so I used a 60-watt replacement LED light bulb instead. It’s only 9.5 watts, so the light stays very cool to the touch regardless of how long the light stays on.
I love how it turned out! Now I just have to make one more.
Just a note about the wall color…


0 Σχόλια